


Yuma, Arizona is the sunniest place in all of America; though this time of year, it does chill down overnight (sometimes cools to 45-degrees overnight), it heats back up to 80-degrees by noon. Cactuses are more prevalent in Arizona, than evergreens are ;-)
I don't go all out for Christmas anymore - I used to when the kids and grandkids were in-house … but, now that they are not, I don't. And I couldn't anyway in 45-ft. 5th wheel, roughly the size of a small shot-gun galley-kitchen studio apartment.
My new husband does not "do" Christmas.
At all.
But because this is my Birthday Month, and I want some kind of festive notation marking my time on Earth … he has consented to this one small chrismasty thing :-)
A week ago, my friend, Pam, sent me a picture text of her tree this year - she and her husband decided to "go small" this year, too:

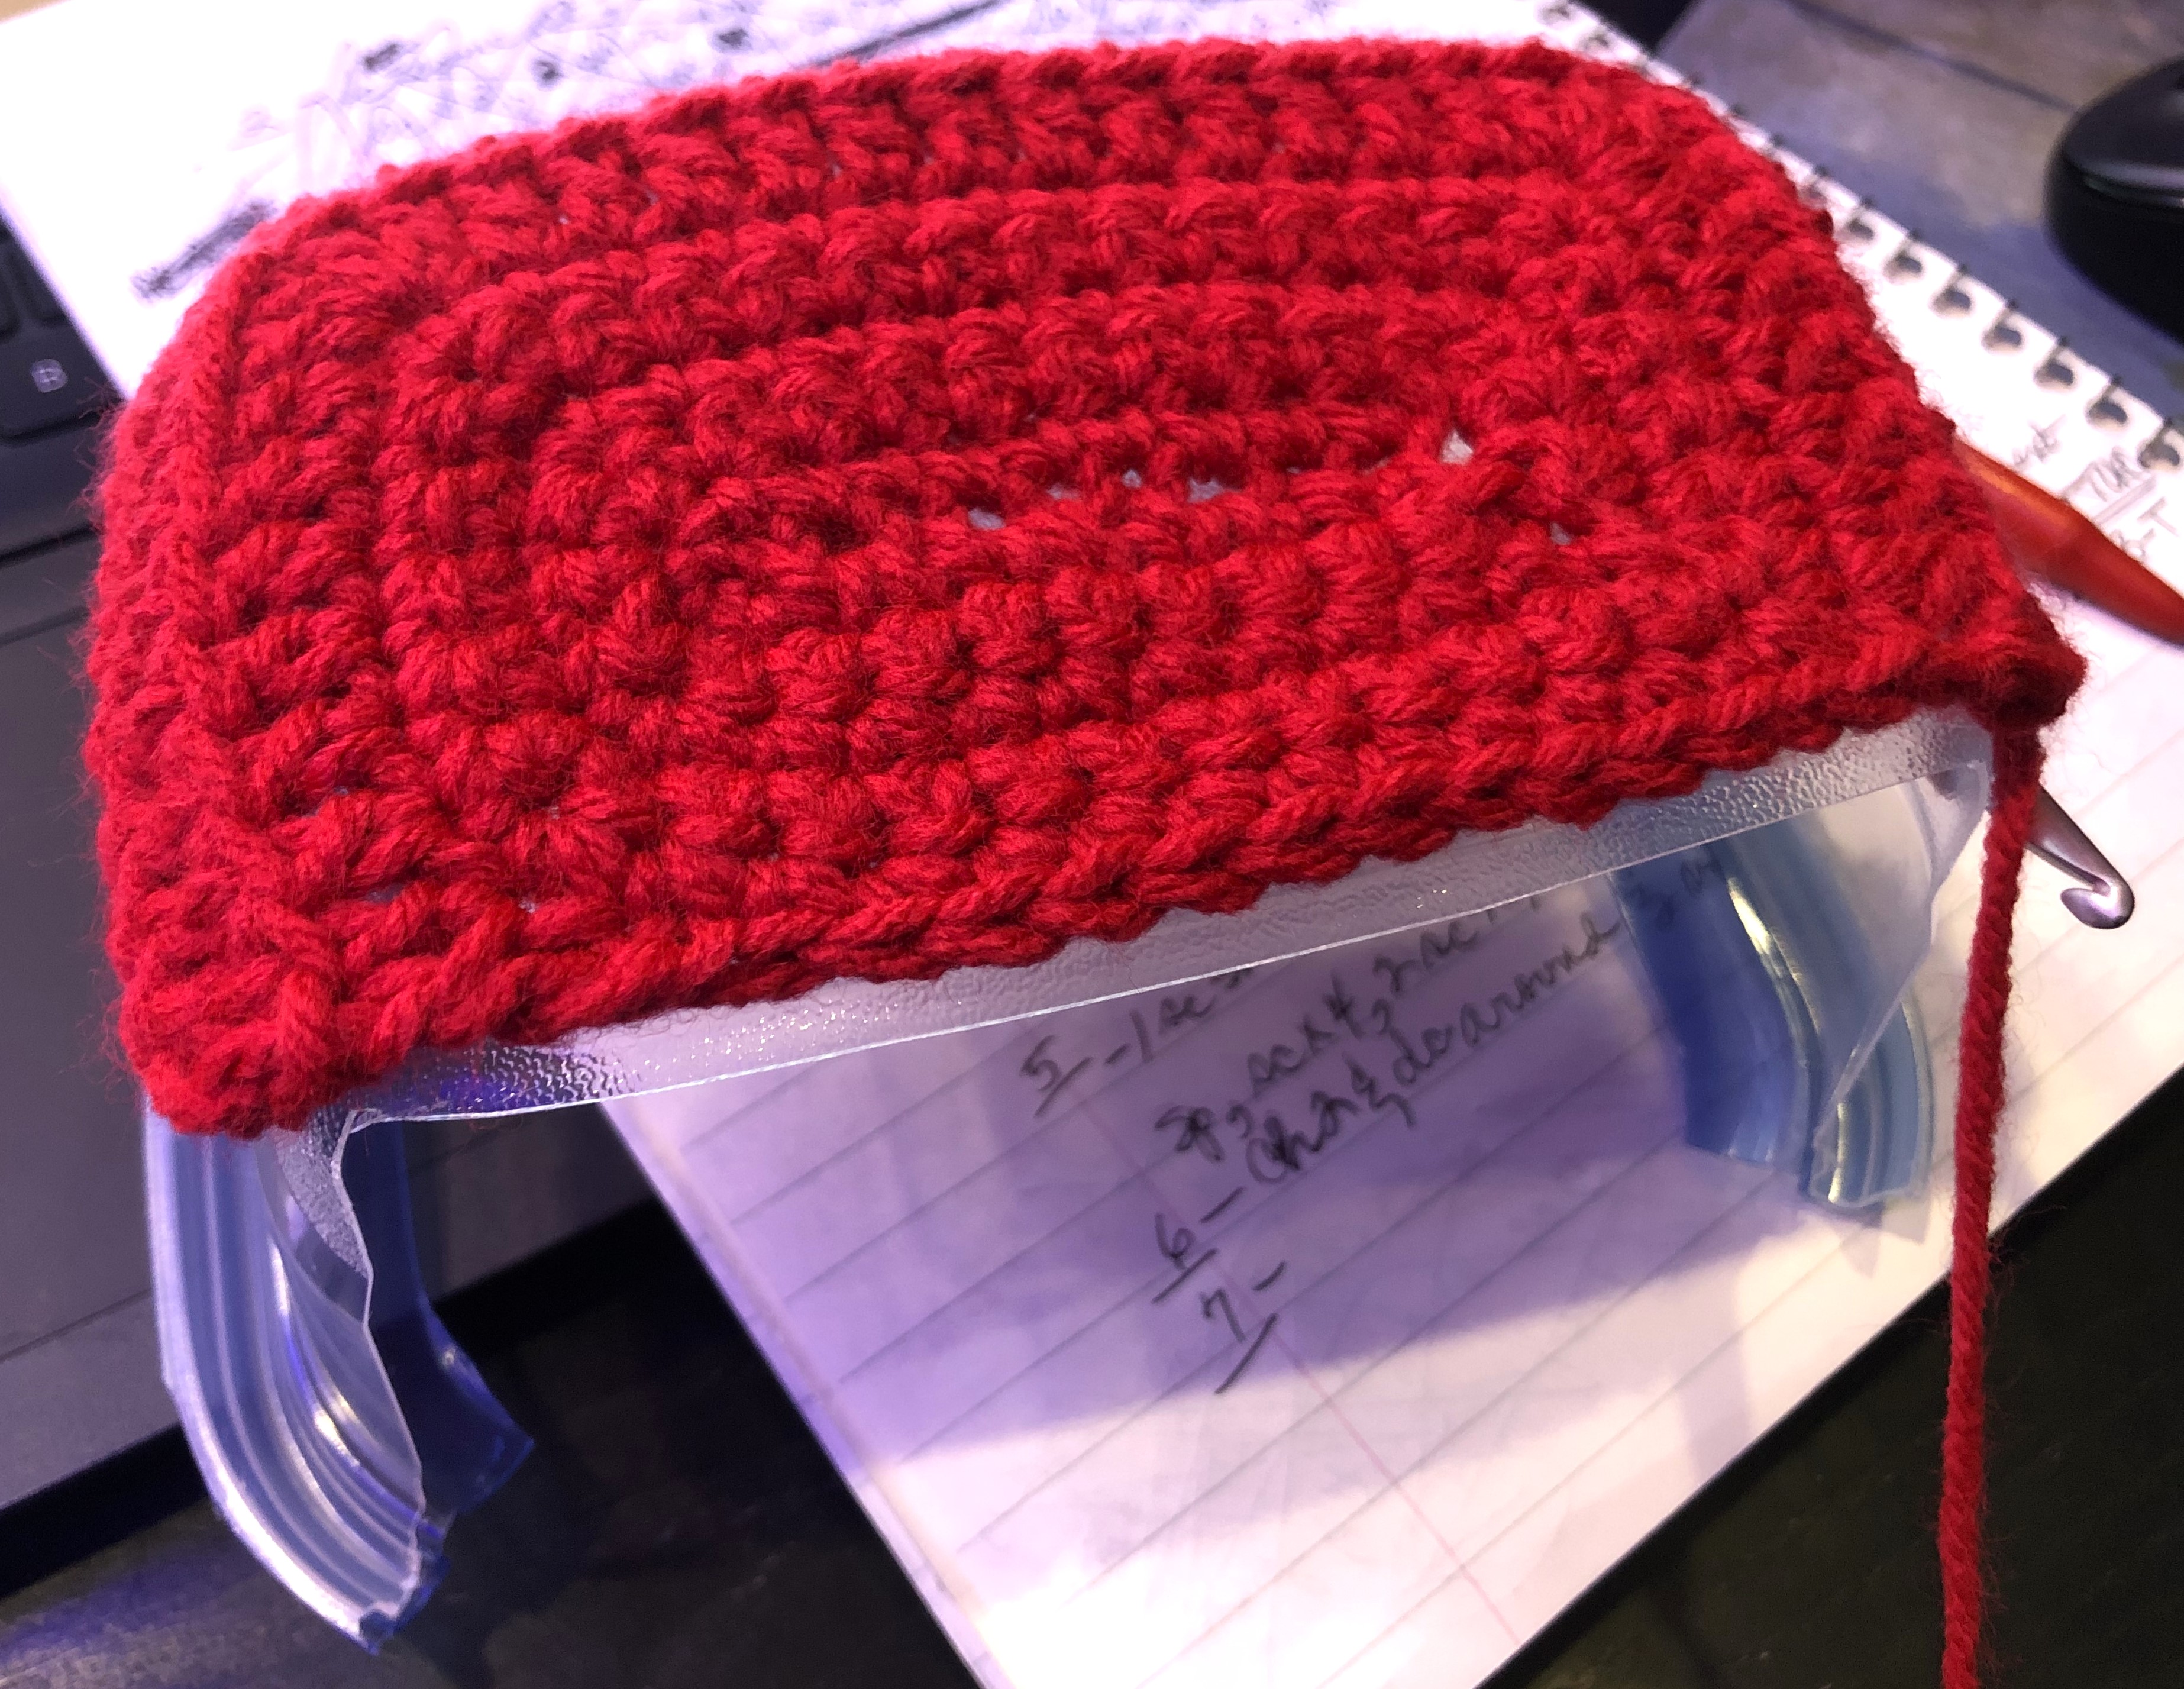
I designed my own Christmas Cactus Pattern, November 28th, and completed it December 2nd. It's very easy to make, using only a few simple basic crochet stitches.
It will also be very easy to unassemble and store away when the holiday is over: space in an RV (even a 45-ft 5th wheel like ours) is very limited, so most extra's we have (inside TV trays & outdoor patio table/chairs), need to be stored flat.

..jpg)


If you live full-time in a 5th Wheel RV in the desert like I do, or you live in a small apartment with a quirky sense of humor like I do - you may enjoy crafting this little christmas cactus to decorate as you wish.
Have a funtastic Holiday!

MOD CHRISTMAS CACTUS PATTERN
Materials:
Worsted yarn - 1 ct. skein Red & 1 skein Green (you will be using doubled yarn throughout; unwind skeins and rewind into doubled red strands ball & doubled green strands ball)
Crochet Hook #H
Assorted small-scale tree trims
Tapestry Needle
Scissors
Throwaway plastic container of choice (oblong or round) to fit base of your cactus
Cardboard for project backing
Ballpoint pen
1 ct. 33-gal. Plastic Garbage bag for stuffing
1 ct. 0.5 lb. weight Resin Command Hook
Terms Used:
ch = chain
sl st = slip stitch
dc = double crochet
hdc = half double crochet
sc = single crochet
st = stitch
inc = increase
dec = decrease
BL = back loops
jn = join
T = turn
TL = total
rpt = repeat
X = times
EA = each
EO = end off
MOD Cactus {tree} instructions:


Row 1: With Green worsted yarn, ch 2; sc x 8 ct. in 2nd st from hook - do not jn.

Row 2: Sl st across the back of the next two sts - do not jn.

Row 3: ch 42, and work a dc in 2nd ch from hook; begin forming first "cactus rib" by dc to end st - ch 3 & T.


Row 4: Dc x 37 (38 sts TL); then work 1 hdc, 1 sc, 1 sl st - T
Row 5: In BL only; 1 sc, 1 hdc; then work dc x 38 - at end of row, ch 3 & T
Row 6: In BL only; rpt row 4.

Repeat rows 5 & 6 one after another, eight times more; there should be 9 completed "cactus ribs".
At the end of last row, ch 1 & sl st x 40 - then work 2 dc in top of cactus and sl st x 40: EO


MOD Cactus Tree Pot:


Row 1: With Red worsted yarn, ch 11; then work 1 sc in 2nd st from hook, sc x 8 ct down foundation ch … make 2 sc in end, and start working back up the foundation ch with sc x 8 ct & jn to first st - ch 1, T
Row 2: 1 sc in same st; sc x 9 ct, 3 sc next st, sc x 9 ct & jn to fisrt st - ch 1, T
Row 3: 1 sc same st; sc x 2 ct, 2 sc in next st, sc x 9 ct, 2 sc next st, sc x 2 ct, 2 sc next st, sc x 9 ct & jn to first st - ch 1, T
Row 4: 1 sc same st; sc x 11 ct, 2 sc next st, sc x 3 ct, 2 sc next st, sc x 3 ct & jn to first st - ch 1, T
Row 5: 1 sc in same st; sc x 4 ct, 2 sc next st, sc x 12 ct, 2 sc next st, sc x 4 ct, 2 sc next st, sc x 12 ct & jn to first st - DO NOT TURN WORK
Row 6: Ch 3 & dc around 3 sides of work, inc 4 sts at EA corner - ch 1 & T
Row 7: Sc around work, inc 3 sts atop EA center inc of previous inc - ch 3 & T
Row 8: Dc across row, inc 3 sts atop EA inc of previous inc - ch 1 & T
Rows 9 thru 14: Rpt sc and dc rows, without inc's.

Row 15: Dc 13, dec, dc x 19 ct, dec, dc x 13 ct - ch 3 & T
Row 16: Working BL only; dc x 12 ct, dec, dc x 18 ct, dec, dc x 12 ct - at the end of row, turn and sl st around entire piece. EO


Piecing the Cactus Tree together:
Dismantle an appropriate sized cardboard box, and with a ballpoint pen, lightly outline your crafted tree shape to a piece of cardboard.


Stuff the cactus tree; and gently whipstitch to cardboard backing: do not pull harshly on the whipstitch or you will cut the cardboard, making it useless. Secure it lightly, but firmly in place.


Trim your cactus tree … anchor the hanging hook in place with the pull-tap adhesive, and hang your tree :-)


HAPPY HOLIDAY!
What a fun space saving Christmas idea. I love your little cactus. Thanks for sharing with us at Handmade Monday.
ReplyDeleteThank you :-)
DeleteThanks for stopping by … have a funtastic weekend!
Amazing, so cute and well done, love it. It's perfect for a small basement suite like ours to make
ReplyDeleteI visited you via Tuesdays with a Twist #552
I linked up this week with = 24+25. I hope you will join us M-S SeniorSalonPitStop. You will find it under BLOGGING.
Thank you :-)
DeleteThanks for stopping by ... I will be sure to check your Page out ;-)
Have a funtastic wekend!
Oh my goodness! How clever and darling! This is a great solution for little space. Great job. I did something similar but not nearly as cute for my daughter in college. She really wanted some Christmas decor, so I found a felt tree with decorations on amazon. It's really for little kids, but worked so well in her little apartment! :) Visiting from the Dare to Share linkup. (I'd love to see you share this post at my linkup as well, if you'd like: https://lifetalesbooks.blogspot.com/p/calling-fellow-bloggers.html) Merry Christmas!
ReplyDeleteThank you :-)
DeleteThanks for stopping by - and I'll return the favor: have a funtastic week!
I'm so glad you shared this post at the Will Blog for Comments #18 linkup! Thank you. Hope to see you there next week as well.
DeleteYour crochet cactus is so adorable and perfect for a small space. I'll be featuring you at this week's #HomeMattersParty. Thanks for sharing!
ReplyDeleteThank you ... and Thank You!
DeleteThanks for stopping by; have a funtastic week!
This is so freaking cute, love it.
ReplyDeleteI visited you via BFF Open House
I linked up this week with = 101+102. It would be awesome if you would share your links with us M-S at SeniorSalonPitStop. You will find it under BLOGGING.
:-)
DeleteI love your cactus/tree, perfect for Arizona and a small living space. Merry Christmas. Thanks for lining with #pocolo
ReplyDeleteThank you :-)
DeleteThanks for stopping by - have a funtastic weekend!
OHHHH, that's so darling and creative! I absolutely love this and will feature it today at Thursday Favorite Things. Thanks for sharing it with us. :)
ReplyDeleteThank you :-)
DeleteAnd thanks for stopping by - have a funtastic Holiday!
This is so cute! Love it. Ps: I love your floor plan.
ReplyDeleteThanks bunches for sharing this tutorial with Sweet Tea & Friends this month.
Thanks :-)
DeleteHave a funtastic Holiday!