GOD KNEW I NEEDED YOU

Showing posts with label handcraft. Show all posts

Sunday, July 12, 2026

MOD CROCHET SC-BAR ST STANDARD BIBLE COVER~Pattern; Castle Rock-WA

MOD Crochet Sc-Bar St Standard Bible Cover; Castle Rock-WA

I designed this cover to fit a standard Bible size 9-1/2 in. L x 6-1/4 in. W

My husband liked the covers I designed and crafted for the Clive Cussler paperback novels, that he asked me to make a cover for his Bible; so, I made one in his favorite colors - red & black:

Materials: Worsted Yarn, MC & CC in colors of choice; small amount of scrap yarn for a length of marker yarn; Sock Yarn, small amount in matching color (or contrast color if desired) #I-9 & #0 hook aluminum crochet hooks; scissors; tapestry needle; trim of choice (if trim is desired)

Terms Used:

BK LP = back loop

CC = contrast color

ch = chain

EA = each

EO = end off

MC = main color

rem'g = remaining

rpt = repeat

RS = right side

r = row

sc = single crochet

st = stitch

T = turn

WS = wrong side

x = repeat


#I'm sorry about the pictures … red yarn sts, does not show well in pictures.

With MC yarn & crochet hook, make a chain of 72

Row 1: T & sc in 12 ch, place marker yarn, sc in next 48 ch, place marker yarn, sc in rem'g 12 sc; ch 1 & T

Row 2: Sc in 12 ch, place marker yarn, sc in next 48 ch, place marker yarn, sc in rem'g 12 sc; ch 1 & T

Row 3: Sc in 12 st, move marker end up, sc in BK LP of next 48 ch, move marker end up, sc in rem'g 12 sc; ch 1 & T

Back (WS) view.
Front (RS) view.

Row 4: Sc in 12 ch, place marker yarn, sc in next 48 ch, place marker yarn, sc in rem'g 12 sc; ch 1 & T

Row 5: Sc in 12 st, move marker end up, sc in BK LP of next 48 ch, move marker end up, sc in rem'g 12 sc; ch 1 & T

Rpt r's 4 & 5 for 9-1/2 inches; checking now and then for length (every Bible is sized differently, even if quoted measurements are the same) & adding trim, if desired:

Rpt r's 4 & 5 for pattern.
Sl st bottom edge trim, between rows 3 & 4, if desired.
Check progress now and then, for length.
Sl st trim top edge trim, 1-inch from top, if desired.

EO leaving a length of yarn for sewing flap to cover.

Finishing: With RS facing, fold 12 sts of the flap backward & whipstitch EA end closed - weave in loose ends. Turn flap inward to make a pocket to slip cover edge into.

Rpt with other cover flap, in same manner.

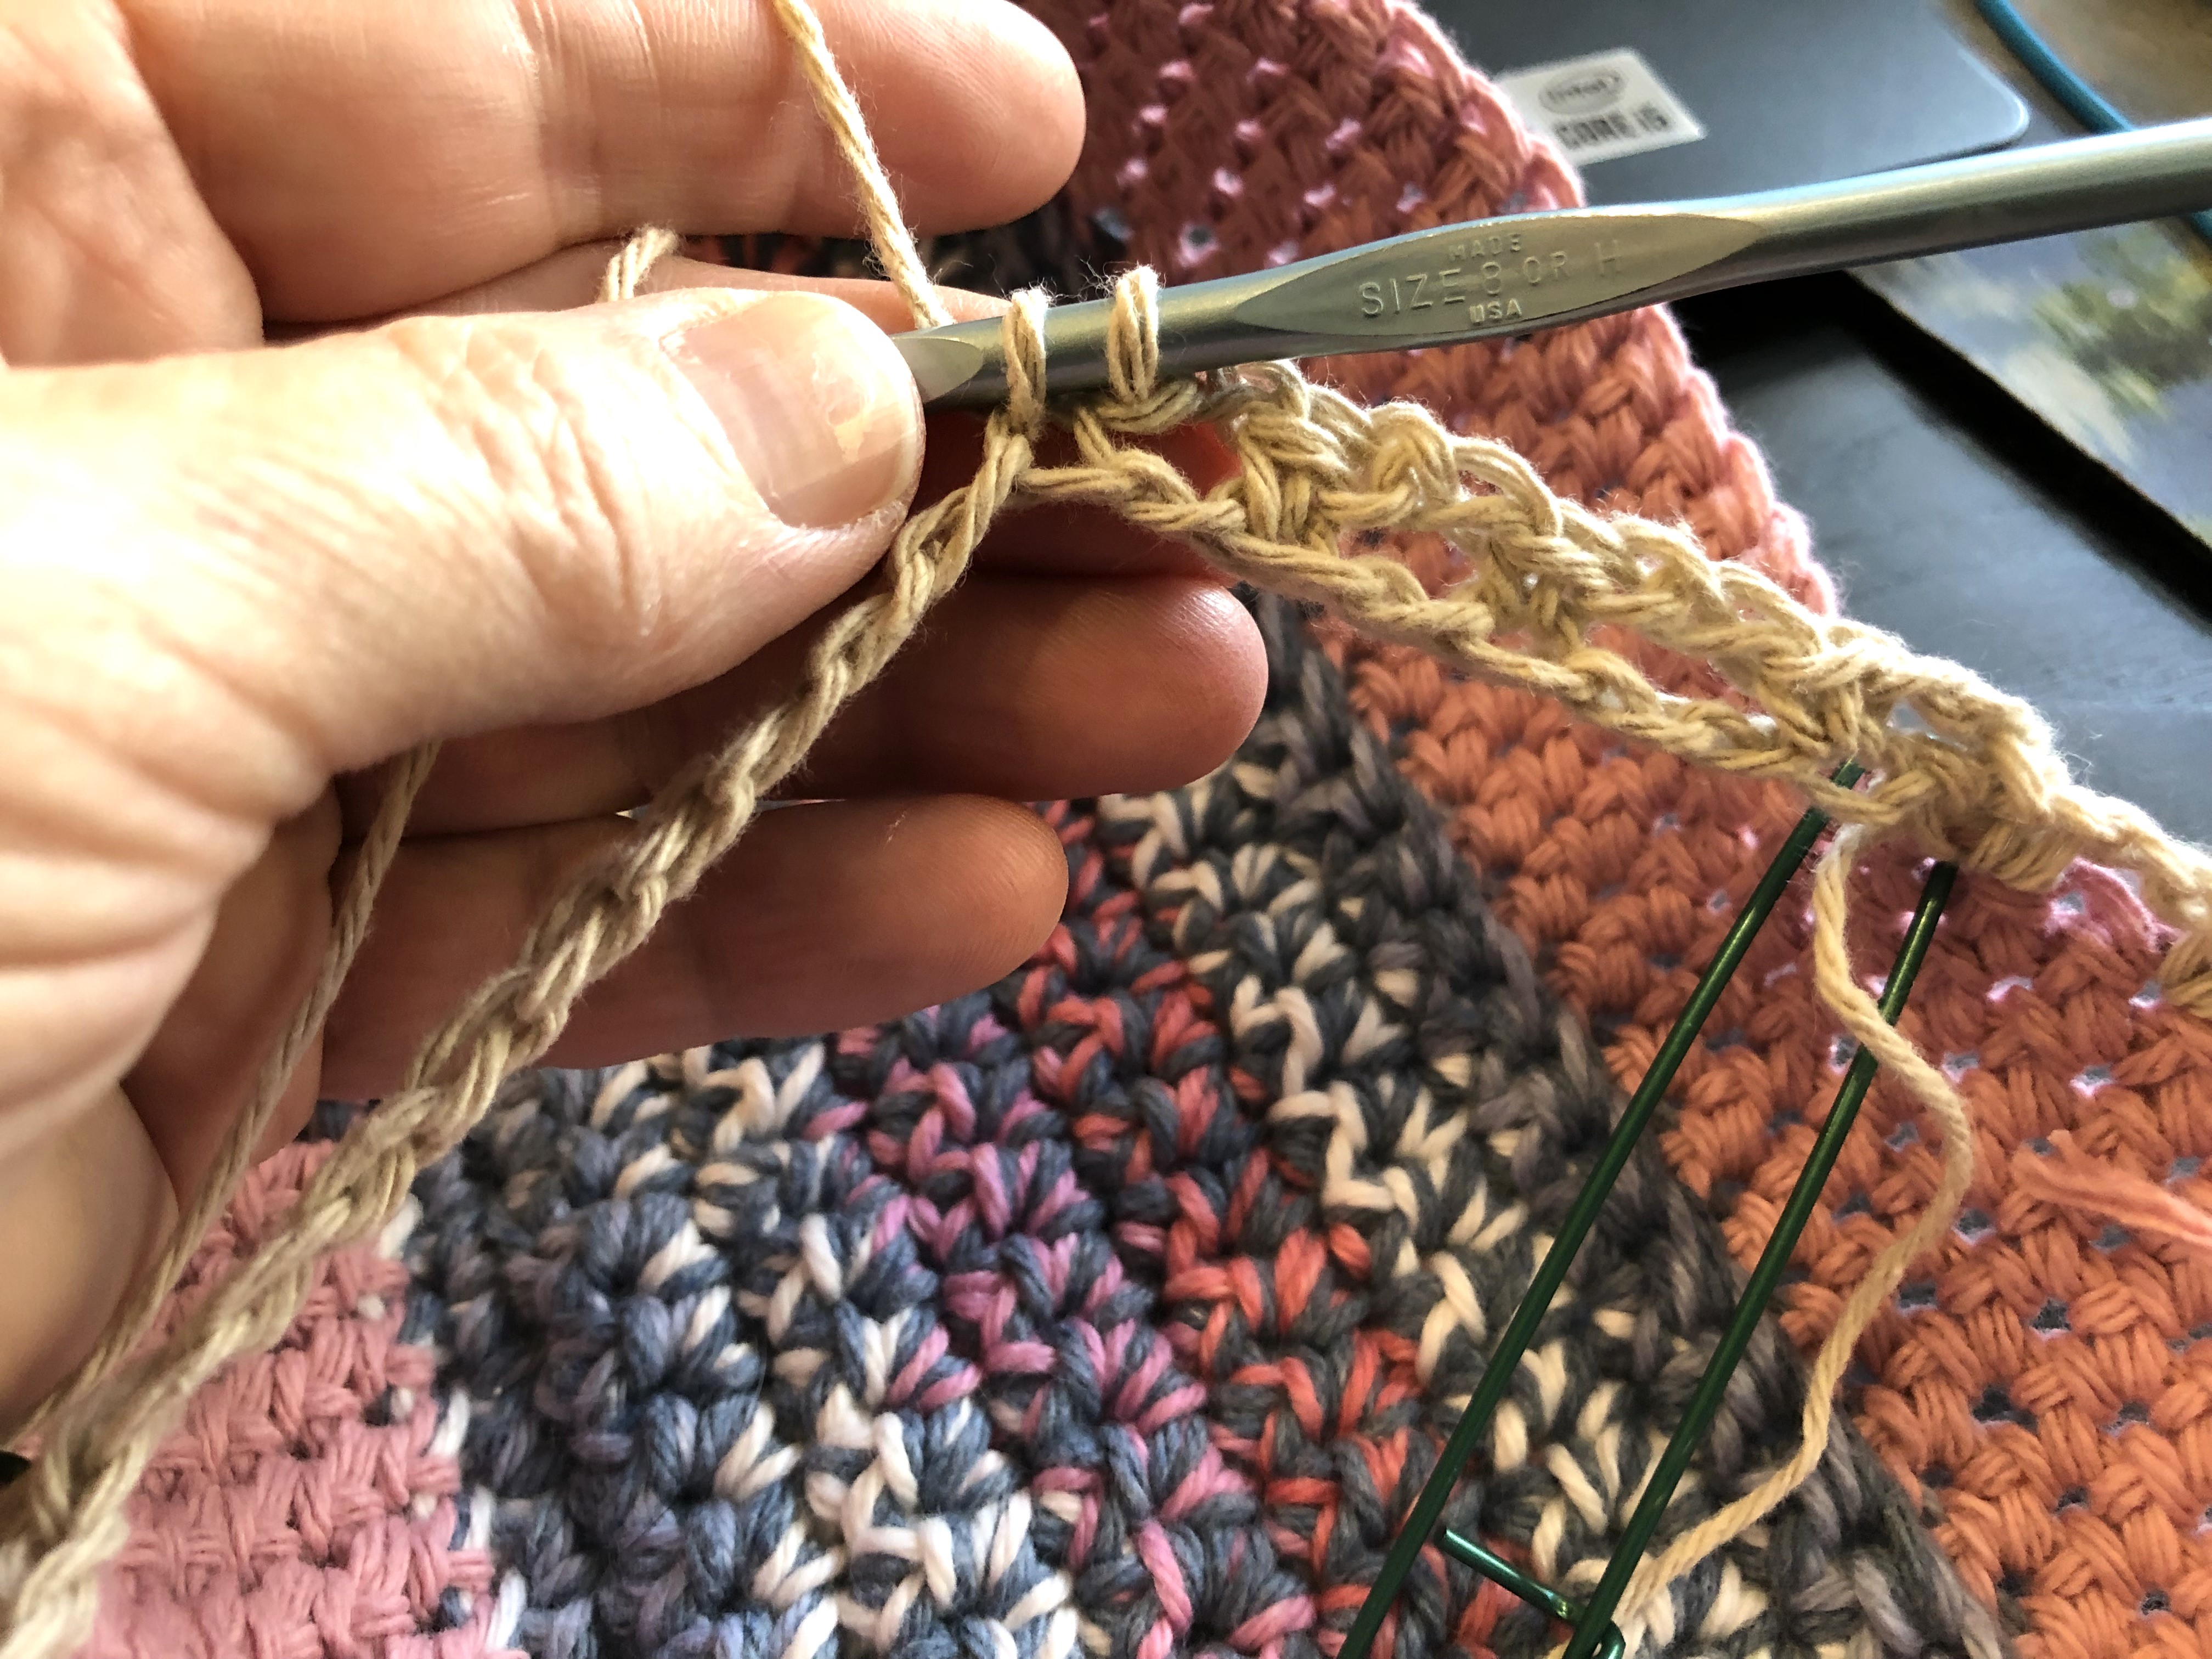
Page Marker: With #0 hook & sock yarn; attach yarn in center top of Book Cover, & make a ch of chosen length - attach trim (or not) & back chain to beginning ch. EO and weave in loose ends.


Easy-peasy ๐Ÿ˜๐Ÿ‘Œ

Enjoy ๐Ÿ“–!

Saturday, July 11, 2026

MOD CROCHET SC-BAR ST PAPERBACK COVER~Pattern; Castle Rock-WA

MOD Crochet Sc-Bar St. Paperback Cover

I wanted a sturdier book cover ๐Ÿ“• for the size 7-1/2-in x 4-in Clive Cussler paperback novels, I'm working my way through this summer … so, I got busy and designed/crafted ๐Ÿ“๐Ÿ“๐Ÿงถ✂️๐Ÿ‘Œ this one; it's nothing fancy, but it's not cheesy, either:

The cover turned out so well … I worked up another one, for switching out ๐Ÿ˜‰

Materials: Worsted Yarn, in color of choice; small amount of scrap yarn for a length of marker yarn; Sock Yarn, small amount in matching color (or contrast color if desired) #I-9 & #1 aluminum crochet hooks; scissors; tapestry needle; trim of choice (if trim is desired)

Terms used:

BK LP = back loop

ch = chain

EA = each

EO = end off

rem'g = remaining

rpt = repeat

RS = right side

r = row

sc = single crochet

st = stitch

T = turn

WS = wrong side

x = repeat


With yarn & crochet hook, make a chain of 59

Row 1: T & sc in 9 ch, place marker yarn, sc in next 40 ch, place marker yarn, sc in rem'g 9 sc; ch 1 & T

Work pattern, with markers = RS

Row 2: Sc in 9 st, move marker end up, sc in BK LP of next 40 ch, move marker end up, sc in rem'g 9 sc; ch 1 & T

Work pattern, slip marker up EA row = WS

Row 3: Sc in 9 st, move marker end up, sc in next 40 ch, move marker end up, sc in rem'g 9 sc; ch 1 & T

Rpt r's 2 & 3 for 7-3/4 inches; checking now and then for length (every book is sized differently, even if quoted measurements are the same):

Pattern; checking now and then for length = RS

EO leaving a length of yarn for sewing flap to cover.

Finishing: With RS facing, fold 10 sts of the flap backward & whipstitch EA end closed - weave in loose ends. Turn flap inward to make a pocket to slip cover edge into.

Rpt with other cover flap, in same manner.

Page Marker: With #1 hook & sock yarn; attach yarn in center top of Book Cover, & make a ch of chosen length - attach trim (or not) & back chain to beginning ch. EO and weave in loose ends.

Easy-peasy ๐Ÿ˜๐Ÿ‘Œ

Enjoy ๐Ÿ“–!

Wednesday, April 8, 2026

MOD SPRING FLORIBUNDA ROSE COASTER; Castle Rock-WA

MOD Spring Floribunda Coaster

I worked up this coaster with blue skies and spring blooming floribunda rose bushes, in my craft design thoughts ๐Ÿค”

I am by nature a mess-cat ๐Ÿ˜ฒ๐Ÿคฆ๐Ÿป‍♀️, so the dark colors work for me … plus, I like the pop splash of bright & bold colors on the senses ๐Ÿ˜‰

This coaster is a bit larger than usual because of the rosebud trim.

Materials: Worsted weight in colors of choice; #6 crochet hook; scissors; tapestry needle.

Terms Used:

ch = chain

st = stitch

dc = double crochet

hdc = half double crochet

tbc = treble crochet

sl st = slip stitch

sp = space

EA =each

EO = end off

rpt = repeat


Coaster Base: ch 3; close with a sl st - this forms a ring.

1) Ch 3, work 11 dc into ring; sl st to top of ch 3 (12 dc)

2) Ch 3 & dc in same space, work *2 dc in EA st* around; sl st to top of ch 3 (24 dc) 

3) Ch 3 & dc in same space, 1 dc next st - work *2 dc in next st, 1 dc next st* around - loosely tie blue yarn in back of work - do not cut; attach green & sl st to top of ch 3 (36 sts)

Attach green for rosebud.

4) Ch 3 & make 3 hdc on hook; drop green … 

3 hdc on hook; rose bud base.

Untie blue yarn and draw through all loops to complete a dc (this is rose bud base): *work 1 dc next two sts, 2 dc in next st, 1 dc in next two next sts* around coaster; sl st to top of green bobble (46  blue dc). Lightly tie blue yarn at back of work; set piece aside.

3 hdc on hook; blue drawn through rose bud base & continued, around.
Lrg. size to accommodate the rose bud base.

Rosebud Instructions:

1) With Rose Pink - and leaving a pretty long tail, join to green & Ch 4 & in back st: work 1 tbc, 1 dc, 1 hdc, sl st in same sp - turn work & sl st at base of foundation ch; turn work again.

Join Pink to green.
Begin floribunda petals.
Turn work & sl st at bud base.

2) Ch 4 & work 1 tbc, 1 dc same sp, 1 hdc & sl st at base of foundation ch. EO, leaving a long tail end.

Ch 4 & work 2nd petal.

3) With the tail end, draw a loop through the center of work & ch 4 - work a 4 tbc in same sp, on hook without closing; join blue & sl st at back of first tbc to close in a cluster. Tie pink ends for later.

Draw a loop through the center of work & ch 4.
Work a 4 tbc in same sp, on hook without closing …
With blue, close to form a cluster.
Sl st at back of first tbc to close in a cluster.
Yarn ends lightly tied at back of work.

4) Continuing with blue, work edging trim as follows: *ch 1, sl st in next st*; rpt around, ending with a sl st in first sl st.

Edging trim.

Turn work & sl st around the trim base (this helps keep the coaster from curling): EO & weave in loose ends.

St st along back border.

Stem & Leaf Trim: With hook & green yarn, pull a loop up at an angle at the left side of coaster; insert hook into coaster base & working in sl st, make a 'stem' shape to base of rosebud - then pull a long loop up and  cutting yarn, leaving a long tail, pull yarn through and tack the long loop in a leaf shape … run yarn end across back to opposite end of bud base and make a similar leaf shape. EO and weave in ends.

Sl st a stem across front upward to bud base (this will camouflage the joining of the rounds - and every rose bud does have a stem ๐Ÿ˜‰)
A nicely finished, simple, Spring-themed Coaster.

I think it turned out pretty well ๐Ÿ˜Š … and it's wide enough to catch any mess-cat mishaps ๐Ÿ˜‚๐Ÿคฃ๐Ÿ˜‰

Sunday, January 28, 2024

MOD SWIFFER JET MOP PAD PATTERN~Revised & Updated; Quartzsite-AZ

MOD Revised & Updated Swiffer Mop Top Pad~January 2024

MOD SWIFFER JET MOP PAD

Materials:

Cotton yarn - 1 skein MC; or 1 skein EA of MC & CC (I used my stash cache leftover odds and ends for this one)

#H size crochet hook

Scissors

Tapestry needle


Terms Used:

ch = chain

sc = single crochet

EA = each

ct = count

sl st = slip stitch

dec = decrease

tog = together

EO = end off


I was making up another of MOD Swiffer Mop Top Pads, when I noticed that the previously posted pattern was seriously off countwise!

I really sorry about that :-(

In both of the previous postings (2019 & 2023) … I had worked up my mop top pads quickly. The first time I designed this pattern, I was grieving the physical death of my first husband - so the pattern was designed as I crafted my work, without writing the pattern down. The second time I worked this pattern, I was on the road with my new bridegroom; and because there was no written pattern from 2019 … I did the best I could by counting out the sts of my original work (and hoping I got the count right): apparently I did not.

This time around, I pulled out the 2023 written document I had posted to my Blog (and Blog Hops - sorry!!!) in October 2023: that is how I found out the mistakes. As I worked this pattern (following that pattern), I made correctional notations - and those directions are true to the design ;-)

And this time, I've also added a few modifications that will make working the drawstring loops easier ;-)

The corrected pattern is as follows.

***************

PATTERN: With two strands of yarn together, ch 31.

Rows 1 - 12: Sc across foundation chain - work 11 more rows sc; after row 12, drop the extra strand of yarn and continue work with a single strand.

The start of MOD Swiffer Mop Top Pad.

Row 13 - Working corners: Sc in 2 sc, making 2 sc in the corner sc; then work (*12 sc, 2 sc next sc, 29 sc, 2 sc next sc*) around piece: 93 sc ct.

Row 14: Sc in each sc, making 3 x 2 sc for a total of 6 sc in EA corner sc: work should follow as written (*12 sc,  3 x 2 sc in next 3 corner sc, 29 sc, 2 sc in next 3 corner sc around piece*): 105 sc ct.

Corner increases …

Row 15: Sc one round even: 105 sc ct.

Row 16: Decrease row: Sc in each of next 2 sc; making dec in EA corner; then work (*14 sc, dec 3 sc tog next sc, 33 sc, dec 3 sc tog next sc*) around piece: 97 sc ct.

Corner decrease.

Rows 16 & 17: sc in each sc: 97 sc ct.

'Sizing' before continuing further …

First drawstring openings: Fold piece in half & count 16 sts from folded edge to top corner BOTH SIDE TO ENSURE EVENESS; now go back to the folded edge and count 5 sts upward - mark. The drawstring loops will be worked between these two markings: attach yarn at the mark, and *ch 2, skip 1, sc next st* for a total of 21 sc posts (20 ct. openwork loops); ch 18 and attach ch to opposite side of work. EO

Folding for accurate marking; and lining up edges for accurate marking.
Ready to begin the drawstring loops.
Drawstring loops; sides of mop top pad.
Foundation chains, for top-side drawstring loops of mop top pad.

Next row - working backwards across foundation ch: attach yarn at the EO spot, and work as follows *ch 2, skip 1, sc next st* (9 openwork loops); EO

Drawstring loops.

Second set of drawstring openings (opposite side): count 9 sc from first drawstring opening EO spot, and attach yarn in next sc. Work as follows - *ch 2, skip 1, sc next st* for a total of 21 sc posts (20 ct. openwork loops); ch 18 and attach ch to opposite side of work.

Next row - working backwards across foundation ch: attach yarn at the EO spot, and work as follows *ch 2, skip 1, sc next st* (9 openwork loops); EO

Drawstring loops, all around …

Drawstring: ch 4 & join to first ch with a sl st.; ch 85 loosely - count backwards 4 sc & join with a sl st. EO

The making of MOD drawstrings …

Weave in all loose ends; and then starting at the center of the top loops … weave the drawstring through all drawstring loops, meeting again at the center of the mop top pad.

Drawstrings threaded through loops.

This Swiffer mop top pad will easily slide over the mop head; tie in place by pulling drawstring to wrap mop top securely around plastic mop head.

Slipping MOD Swiffer Mop Top Pad over the mopping end of the Swiffer Mop.
A good fit ;-)
Securing the mop top pad to the mopping end …
Perfect ;-); topside & underside.

There will be some shrinkage after washing and drying cotton yarn, but just pull on it a bit to loosen it up :-)